Vintage Train Book Nook Kit: DIY Wooden 3D Bookend
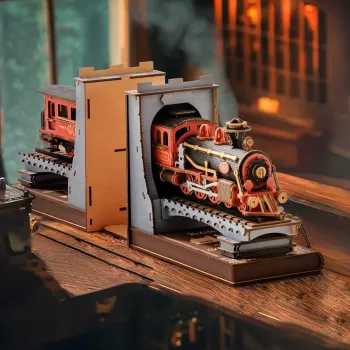
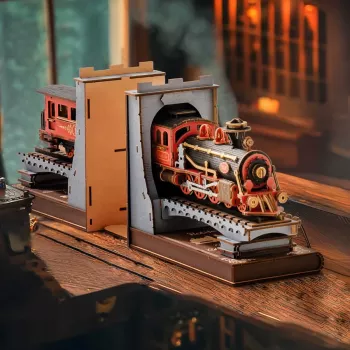
Vintage Wooden Train Book Nook: Build a Tiny Rail Scene That Lives Between Your Books
Some shelves are just storage. Others become a little world. The Vintage Wooden Train DIY Book Nook Kit turns an ordinary row of novels into a miniature rail stop—wooden layers, warm details, and a classic train silhouette that feels pulled from a storybook. It’s a hands-on build that suits quiet evenings, weekend projects, and gift-giving for readers and makers alike. The finished piece works as a bookend-style display, adding depth and atmosphere without taking over the whole shelf.
Why a train-themed book nook belongs on a bookshelf
A book nook isn’t just a decoration—it’s a pause in the “wall of spines” that makes your shelf feel intentional. A vintage rail scene is especially good at creating that moment of story between chapters and volumes.
- It creates a “scene break” on the shelf, making long series and tall stacks feel curated instead of crowded.
- The vintage train look pairs naturally with classics, mysteries, fantasy, and travel writing—anything with a sense of journey.
- It’s a satisfying build for adults and teens who enjoy models, puzzles, miniatures, and screen-free focus.
- It’s more interactive than décor: the charm comes from assembling it, then noticing tiny details every time you pull a book.
What this kit delivers: a buildable 3D puzzle that becomes a bookend-style display
Our team loves projects that earn their place on your shelf. This one does exactly that: it starts as a wooden puzzle-style build and ends as a dimensional insert that sits between books like a small portal scene.
- A DIY wooden model experience: you assemble layered pieces into a structured book nook.
- Designed to sit between books, adding depth and a themed focal point without needing a lot of extra shelf space.
- A practical finish: once assembled, it works as a shelf accent and bookend-style support rather than a loose desktop trinket.
- A project that scales to you: keep it clean and classic, or personalize with careful paint, weathering, or extra props.
Quick guide: who this train book nook kit suits best
| Builder type | What they’ll enjoy | Helpful add-ons |
|---|---|---|
| Adults who love puzzles | Step-by-step assembly and the payoff of a finished scene | Tweezers, small file, good lighting |
| Teens into crafts/models | Hands-on building with a display result that feels “grown-up” | A craft mat, patience, music |
| Readers and collectors | A shelf centerpiece that makes a series look special | Bookends, shelf lighting nearby |
| Gift shoppers | A present that’s an activity plus a keepsake | A note: “Build it on a cozy night” |
Shop the build (and a small gift add-on)
If you’re ready to start, here are two in-stock picks our customers often pair together—one for the shelf, one for the person behind the shelf.
- Vintage Wooden Train DIY Book Nook Kit – 3D Puzzle Bookend for Adults & Teens
- Red Agate Heart Pendant Necklace in 925 Sterling Silver – Classic Vintage Jewelry for Women
Before you start: set up for a smoother build
A calm setup makes the whole project more enjoyable—and usually leads to cleaner alignment and fewer “where did that piece go?” moments.
- Clear a small workspace: a tray or shallow box lid helps keep tiny pieces from wandering.
- Use bright, steady light: it reduces mistakes and makes alignment easier.
- Plan for breaks: the cleanest builds come from steady pacing, not rushing.
- Keep ventilation in mind if you’re using glue, paint, or finishing products—fresh air makes long sessions more comfortable.
For general safety basics around adhesives and hobby materials, the U.S. Consumer Product Safety Commission’s hobby and craft safety guidance is a solid reference. If you’re working indoors for longer stretches, OSHA’s overview of ventilation and indoor air quality is also helpful.
How to make it look “library-worthy”: finishing touches that elevate the scene
The best-looking book nooks are usually the ones built patiently. A few simple habits can make your finished insert look crisp and intentional, even if you keep everything unpainted.
- Dry-fit first: test connections before committing with adhesive so edges meet neatly.
- Refine the edges: a light pass with fine sandpaper can make joints look more seamless.
- Add gentle weathering: subtle browns/greys can give the train-and-station vibe extra vintage character.
- Shelf styling tip: place the nook near hardcovers or darker spines so the scene reads clearly from a distance.
If you want a little theme inspiration for your shelf story, a quick skim of rail transport history can add context for your palette choices and “era” feel; Encyclopaedia Britannica’s overview of railroads is a reliable starting point.
Gifting ideas: make the kit feel personal from day one
This is one of our favorite “activity gifts” because the giving doesn’t end when the wrapping comes off—you’re handing someone a cozy project and a shelf keepsake in one.
Care and display: keeping a book nook looking sharp on the shelf
FAQ
Is this book nook kit suitable for teens?
Yes—this style of DIY wooden book nook is a great fit for teens who enjoy crafts, models, or puzzles. If sharp tools or glue are used, adult supervision is a good idea, and good lighting plus a tidy workspace helps a lot.
What basic tools help with a wooden DIY book nook build?
Tweezers, small scissors or a craft knife, a sanding stick or fine sandpaper, and a ruler are common essentials. Many builders also like small clips for holding pieces in place and a craft mat to protect the work surface.
How can the finished train book nook be displayed securely between books?
Place it between stable, similarly sized books on a level shelf so both sides support it evenly. Avoid squeezing it too tightly; using heavier books or bookends nearby can help keep everything upright and aligned.








Leave a comment